
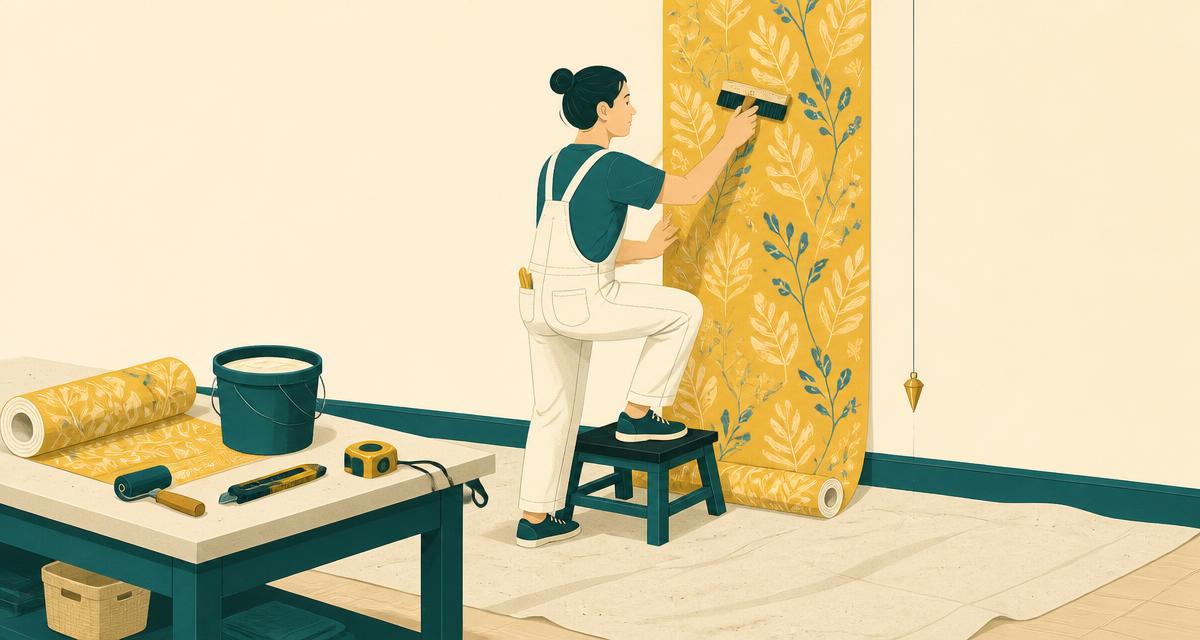
The short version
Hanging paper is four decisions and one discipline. The decisions: what the wall is made of, whether it needs lining, how many rolls to buy from one batch, and where the first drop goes. The discipline is soak time — every drop treated exactly the same as the first, every time, without exception.
0.52 m
Width of a standard UK roll — your drop spacing
10.05 m
Length of a standard roll, before repeat waste
100 mm
Trim allowance to add to every drop
1 spare
Extra roll from the same batch number, always
Everything else in this guide is the detail behind those numbers — including a calculator that does the roll arithmetic for you and a fault table that tells you whether a bad seam is savable. If you would rather not spend a weekend up a step stool, our wallpaper hanging service preps, lines and hangs in one visit, at a price agreed before anyone opens a roll.
Read the wall before you buy the paper
Paper is only ever as good as the surface underneath it, and British housing stock offers a remarkable range of surfaces. Spend ten minutes identifying yours: knock it, look at the skirting, and push a pin into an inconspicuous spot.
| Wall | How to spot it | What it needs first |
|---|---|---|
| Lath and plaster (pre-1930s) | Hollow but dull knock, springy in places, hairline cracks that follow horizontal lines | Fill and consolidate cracks, then cross-line with 1200–1400 grade lining paper |
| Solid plaster on brick | Dead, solid knock everywhere; heavy and cold to the touch | Fill, sand, size — usually no lining needed if the skim is sound |
| Dot-and-dab plasterboard | Hollow ring with solid spots roughly every 300 mm; common in 1990s onward and refurbs | Seal any bare board with a primer so paste does not soak into the paper facing |
| New-build board and skim | Uniform hollow ring, crisp corners, taped joints visible in low light | Let the plaster dry fully — weeks, not days — then mist-seal and size |
| Stone or exposed brick with hard render | Very solid, uneven, cold; typical of Pennine and mill-town properties | Level with a skim or heavy lining; check for damp before anything else |
Which paper, and why it matters more than the pattern
The pattern is the part you choose with your eyes; the backing is the part that decides how hard the weekend is. Non-woven papers are the single biggest improvement in DIY decorating of the last twenty years, because they do not expand when wet.
| Type | Method | Best for | Difficulty |
|---|---|---|---|
| Non-woven (paste the wall) | Paste the wall, hang dry from the roll | Almost any room; the sensible first choice | Easiest |
| Standard pulp / printed | Paste the paper, fold and soak | Budget refreshes, low-traffic bedrooms | Moderate |
| Vinyl and washable | Usually paste the wall; overlap seams need vinyl adhesive | Kitchens, bathrooms, hallways, rentals | Moderate |
| Textured, embossed and anaglypta | Paste the paper, generous soak, no seam pressure | Covering imperfect walls before painting | Moderate |
| Grasscloth, silk and hand-printed | Paste the wall, no paste on the face, no seam roller | Feature walls where budget allows a professional | Expert only |
| Peel and stick | Self-adhesive, no paste | Rentals and short-term changes on smooth walls | Easy but unforgiving of texture |
Whatever you choose, buy every roll in one order and check the batch number printed on each label is identical. Two batches of the same paper can differ enough in shade that the join is visible across a room in afternoon light — and the second batch is always the one you need mid-wall.
How many rolls: the calculator
Roll counting is where most jobs go wrong before they start. The arithmetic is simple but unforgiving: your drop count comes from the wall width divided by the roll width, and your drops-per-roll come from the roll length divided by the cut length once the pattern repeat has rounded it up. Enter your wall below.
Buy
8 rolls
- Drops needed
- 24
- Cut length per drop
- 2.65 m
- Drops per roll
- 3
- Approx. waste
- 21%
Add one spare roll from the same batch number. Windows and short walls above doors are ignored on purpose — offcuts rarely cover a full drop, and a half-drop pattern needs one extra repeat per drop.
- Measure the perimeter, not the floor area. Walk the room with a tape and add the wall lengths, including the chimney breast returns.
- Ignore windows and doors unless a door removes a whole drop. An offcut above a door rarely covers a full drop elsewhere with the pattern matched.
- Measure the height where it is greatest. Old floors slope; take the tallest reading from skirting to cornice and use that everywhere.
- Add one spare roll. It costs less than a batch mismatch and covers the socket you cut through and the scuff in year three.
Pattern repeats and half-drop matching
The repeat is the vertical distance before the design starts again, printed on the label in centimetres. It is also the amount of paper you throw away on every single drop, which is why a bold 64 cm repeat can need two rolls more than a plain paper on the same wall.
| Match | What it means | Waste per drop | Notes |
|---|---|---|---|
| Free match / random | No alignment needed at the seam | Trim only, about 100 mm | Plains, textures, some stripes — reverse alternate drops |
| Straight match | The design lines up at the same height across the seam | Up to one full repeat | The most common patterned paper |
| Half-drop / offset match | Alternate drops are shifted by half a repeat | Up to one and a half repeats | Buy an extra roll; number your drops as you cut |
| Mural / panel | Numbered panels form one image | None, but no margin for error | Hang to a centre line and check panel order twice |
Lining paper: when it is not optional
Lining paper is the least glamorous roll in the shop and the one that saves the most jobs. It equalises absorbency, bridges hairline cracks, hides old colour and gives the finish paper a consistent surface to grip.
Line the wall when
- The wall is lath and plaster, or has been filled in more than a few places.
- The existing colour is dark, glossy or patchy and the new paper is pale or thin.
- The plaster is old, dusty or has been stripped back from previous paper.
- You are hanging an expensive, delicate or hand-printed paper you cannot afford to lose.
- The wall is a cold external elevation — an insulated lining also lifts surface temperature.
Hang lining horizontally — cross-lining — so its seams cross the vertical seams of the finish paper rather than sitting under them. Butt the joints, never overlap them, and let the lining dry fully, ideally overnight, before the finish paper goes up. Grades run roughly 800 to 2000: 1000–1200 for general work, 1400 for uneven walls, 1700 plus where the surface is genuinely rough.
Preparation: the eighty percent nobody photographs
- Clear and protectMove furniture to the centre, dust-sheet the floor, take down curtain poles and shades, and turn off the power at the consumer unit before removing socket faceplates.
- Strip and make goodRemove old paper completely, rake out cracks, fill with a flexible filler, and sand back flush once dry. Any ridge you can feel will show through the finish paper.
- Clean and sealSugar-soap greasy areas, especially kitchens and above radiators, rinse, and prime bare plaster or exposed plasterboard so it stops drinking paste.
- Size and set outBrush on size or diluted paste, let it dry, then mark your plumb line and the centre line of any chimney breast before the first drop.
The kit you actually need
| Tool | Why it matters | Rough cost |
|---|---|---|
| Pasting table | A flat, clean, correctly sized surface — a floor introduces grit into the paste | £15–£30 |
| Plumb bob or laser level | Your only true vertical; the wall is not one | £8–£60 |
| Smoothing brush | Expels air without polishing or stretching the paper | £8–£15 |
| Paste brush or short-pile roller | Even coverage on wall or paper; a roller suits paste-the-wall | £6–£14 |
| Seam roller | Beds the joint — never used on embossed or delicate papers | £4–£8 |
| Snap-off knife plus spare blades | A blunt blade tears damp paper; change it every few cuts | £5–£10 |
| Broad taping knife | The straight edge you cut against at skirting and cornice | £6–£12 |
| Bucket, sponge and clean water | Paste left on the face dries shiny and permanent | £5–£10 |
The first drop decides everything
Hang the first drop to a corner and you inherit that corner's lean for the rest of the room. By the fourth wall the pattern will have climbed or fallen visibly, and there is no recovering it without starting again.
- Plumb, do not assume. Mark a true vertical one roll width — about 500 mm — from the corner of the wall you notice first when you walk in.
- Centre a bold motif. On a chimney breast or a strong repeat, work out from a centre line so the design sits symmetrically on the focal wall.
- Start where the eye lands. Plan the run so the inevitable pattern mismatch at the closing corner falls behind a door or in the least-seen corner.
- Re-plumb at every corner. Each new wall gets its own vertical line — that is what keeps the room true.
Hanging, step by step
- PastePaste the wall slightly wider than the drop for non-woven paper, or paste the paper edge to edge, fold paste-to-paste and soak for exactly the time on the label.
- PositionOffer the drop to the plumb line with about 50 mm overlap at the cornice, hold the top, and let the rest fall. Slide it — do not stretch it — until the edge sits on the line.
- SmoothWork the smoothing brush from the centre outwards and downwards in a herringbone pattern to push air to the edges. Never rub in circles or press hard.
- Trim and cleanCrease into the cornice and skirting with the taping knife, cut with a fresh blade, and sponge every trace of paste off the face and the skirting immediately.
Butt the next drop tight to the last, matching the pattern at eye level rather than at the top of the wall — the eye reads a mismatch at 1.6 m and forgives one at 2.4 m. Give the seam five to ten minutes to become tacky before rolling it lightly; roll immediately and you squeeze the paste out, roll too late and the joint has already set.
Rather not spend the weekend on a step stool? Get a fixed price for the room before anyone opens a roll.
Corners, reveals and awkward runs
Internal corners
Measure from the last hung drop to the corner at the top, middle and bottom. Take the largest measurement, add 20 mm, and cut the drop to that width down its length. Hang it so the 20 mm turns onto the next wall. Then hang the offcut on the new wall to a fresh plumb line, overlapping the turn. On a vinyl, use an overlap or vinyl adhesive at that joint — ordinary paste will not stick vinyl to vinyl.
External corners
Turn no more than 25 mm around the corner, then plumb and hang the next drop to overlap the turn. Wrapping a full drop around a chimney breast is the fastest way to a visibly leaning pattern down the face of the breast.
Window and door reveals
Hang the drop over the opening, cut diagonally into the corners of the reveal, fold the flaps into the return and trim. Patch the top of the reveal with a matched offcut. Work from the reveal outwards on very deep Victorian reveals, so the visible face of the wall keeps the matched pattern.
Sockets, radiators and staircases
- Sockets and switches: isolate the circuit at the consumer unit, loosen the faceplate, hang the paper over it, cut a small diagonal cross over the plate, trim back inside the plate footprint and re-fit. Never cut around a live faceplate.
- Radiators: ideally drain and remove. If not, cut the drop into two vertical tongues to slide behind the radiator and smooth them with a radiator roller — you only need to paper what is visible from the doorway.
- Staircases and stairwells: the highest drop is measured first and the job planned around it. Use a proper stairwell platform or a hop-up with adjustable legs, never a ladder resting on a step. This is the room most worth handing over.
- Cornice and picture rails: trim against a taping knife with a fresh blade every few cuts; a dragged blade tears wet paper and there is no repairing it.
Feature walls and murals
A feature wall is a two-to-three-hour job with a disproportionate effect, which is why it is the most-booked wallpapering visit we run. Two rules make the difference. First, choose the wall the room already looks at — the chimney breast, the bed head, the wall facing the door — not the wall that happens to be empty. Second, set out from the centre so the design sits symmetrically and any part-drop lands in the corners.
Panel murals are numbered and must be hung to a centre line, not from a corner. Lay every panel out on the floor in order first, check the numbering against the supplied diagram, and measure the total width against the wall before pasting anything: mural sets are made to a fixed size and cannot be stretched to fit an out-of-square room.
Damp, condensation and mould
Wallpaper is the most common cosmetic cover-up for a damp wall, and the least effective. The paste stays wet, mould colonises the back of the paper, and the drop lifts within weeks — usually taking a layer of plaster with it.
| Sign | Likely cause | Do this first |
|---|---|---|
| Black spotting in corners and behind furniture, worse in winter | Condensation on a cold surface | Improve ventilation and heating; consider insulated lining paper |
| Tide mark up to about a metre, salty deposits, damaged skirting | Rising damp or a bridged damp-proof course | Get it surveyed; do not paper until the wall is treated and dry |
| Isolated patch high on an external wall, worse after rain | Penetrating damp — pointing, gutter or flashing | Fix the external defect, dry the wall, then treat and prime |
Once the cause is resolved and the wall is genuinely dry, wash with a fungicidal solution, let it dry, prime, and use a paste containing a fungicide. On a permanently cold external wall, insulated lining paper measurably reduces surface condensation and is worth the extra step before the finish paper.
Faults: causes and honest fixes
| Fault | Cause | Fix |
|---|---|---|
| Seams opening a few millimetres | Uneven soak, thin paste, unsized wall, or the room dried too fast | Seam adhesive and a light roll while damp; re-hang once dry |
| Blisters and bubbles | Trapped air or insufficient soak time | Many disappear as the paper dries; otherwise slit with a blade, inject adhesive, smooth flat |
| Edges curling away | Paste missed the edge, or the wall drank it before hanging | Lift gently, apply overlap adhesive, roll and hold |
| Shiny patches on the face | Paste left on the surface, or over-rolled seams | Wipe early with clean water; dried paste is usually permanent |
| Pattern climbing across the room | Hung to a corner instead of a plumb line | No fix — re-hang from a true vertical |
| Dark shading between drops | Two batch numbers, or alternate drops not reversed on a free-match paper | Re-hang the mismatched drops from one batch |
| Paper lifting in patches after weeks | Damp behind the wall, or dusty unsealed plaster | Strip back, resolve the cause, prime and re-hang |
Stripping old paper safely
Stripping is not glamorous but it is where the plaster is saved or destroyed. Score the surface lightly with a spiked roller — lightly, because deep scoring cuts the plaster — then soak with warm water and a little washing-up liquid or wallpaper stripper, and give it fifteen minutes to work before touching a scraper.
- Use a steamer sparingly on lath and plaster; prolonged steam softens the plaster keys and can bring a ceiling or a wall down.
- Hold the scraper at a shallow angle and let the water do the work; gouges have to be filled and sanded later.
- Vinyls usually peel as a top layer, leaving the backing paper — soak and remove that too rather than papering over it.
- Wash the wall down afterwards to remove residual paste, then let it dry fully before filling.
Ten mistakes that ruin a room
- Hanging the first drop to a corner instead of a plumb line.
- Buying rolls from two batch numbers.
- Skipping sizing on porous plaster.
- Varying soak times from one drop to the next.
- Overlapping seams instead of butting them.
- Rolling the seam immediately, squeezing the paste out.
- Drying the room fast with heating or a fan.
- Cutting with a blunt blade and tearing damp paper.
- Leaving paste on the face and skirting to dry shiny.
- Papering over damp, or over a live socket faceplate.
What wallpapering costs in the UK
| Job | Typical price | Time on site |
|---|---|---|
| Feature wall, plain or straight match, prepped wall | £180–£280 | 2–3 hrs |
| Feature wall, half-drop or delicate paper | £240–£350 | 3–4 hrs |
| Standard bedroom, four walls | £350–£550 | 1 day |
| Living room with chimney breast and alcoves | £450–£700 | 1–1.5 days |
| Cross-lining a room before papering | £150–£300 | 0.5 day |
| Hallway, stairs and landing | £450–£900 | 1.5–2.5 days |
| Stripping old paper and making good | £120–£280 per room | 0.5–1 day |
Prices rise for stairwells needing access equipment, ceilings, hand-printed or grasscloth papers, and walls that have to be lined or re-skimmed first. They fall when several rooms are done in one booking, because the set-up and prep overlap. Materials sit on top: standard rolls from about £15, designer papers from £60 to well over £100 a roll.
DIY or hand it over
Papering is one of the few trades where the first attempt is visibly the first attempt. That is fine on the right wall and expensive on the wrong one.
| Job | Verdict |
|---|---|
| Plain or textured paper on a sound bedroom wall | Good first job — forgiving, low stakes |
| Non-woven straight-match feature wall | Achievable in an afternoon with care |
| Half-drop pattern across a whole room | Doable, but budget an extra roll and a full day |
| Hallway, stairs and landing | Hand over — access work, long drops, high visibility |
| Grasscloth, silk or hand-printed paper | Hand over — the material is unforgiving and expensive |
| Any wall with damp, or textured coating pre-1985 | Resolve the cause first; get the coating tested |
The economics are simple: on a £600 roll order, a professional day rate is cheaper than one ruined wall. On a £45 bedroom refresh, it is not — so start there, learn on it, and keep the expensive paper for someone who hangs it every day. Our wallpaper hanging service covers both ends: a single feature wall or a full house, priced before we start.
Ask a question about your wall
Ask a question about your wall
Describe what you are hanging and what the wall is made of. We will point you at the part of this guide that answers it — or pass it to the handyman desk for a human reply.
Papering in Greater Manchester
Greater Manchester makes this job unusually varied. Within a few miles you move from lath-and-plaster terraces to concrete mill conversions to dry-lined new builds, and each wants a different first move.
- Victorian and Edwardian terraces in Chorlton, Levenshulme, Whalley Range and Didsbury are lath and plaster with tall ceilings — typically 2.7 m or more. Expect cross-lining, more filling than you planned, and one extra drop per wall over a modern room of the same width.
- Mill and warehouse conversions in Ancoats, the Northern Quarter, Castlefield and Salford Quays have dense concrete or blockwork walls, sometimes with exposed brick that has to be levelled or deliberately left alone. Drops of 3 m and over are a two-person job.
- Pennine stone properties in Uppermill, Saddleworth, Ramsbottom and Littleborough have cold, thick external walls where condensation is the real enemy. Insulated lining paper before the finish paper is money well spent.
- Post-war and new-build estates in Wythenshawe, Hulme, parts of Oldham and the Trafford and Stockport fringes are dot-and-dab or board-and-skim. Prime the board, and check any recent plaster is genuinely dry before papering.
- Student HMOs around Fallowfield, Rusholme and Withington need washable vinyl on the hallway and stair walls; anything delicate will not survive a tenancy.
Local coverage runs across all 115 areas from our Greater Manchester wallpaper hanging hub, with wall-surface detail, drop counts and a roll calculator on every area page.
Frequently asked questions
Related services
- Wallpaper hangingPrep, lining and hanging in one visit — fixed price agreed before we start.
- Mirror & artwork hangingFixing into a freshly papered wall without wrecking the finish.
- Shelf installationFloating and bracketed shelving fixed to the right load rating.
- Handyman servicesOne tradesperson, one visit, a list of jobs — by the hour or half day.
You might also find useful
- How to hang mirrors and artwork: the complete DIY guideIdentify your wall in ninety seconds, match the fixing to the weight, get the height right first time, plan a gallery wall on the floor, and know the three jobs worth handing over.
- How to fit blinds and curtains: the complete measuring and fitting guideThe measuring deductions that stop a blind jamming, recess vs face fit, pole heights and fabric widths, bay and uPVC windows, and the child-safety rules every fitted blind must meet.
Walls prepped, lined and papered properly
DBS-checked decorators, £5m public liability cover and a fixed price agreed before the visit — across Greater Manchester and the South East.