
The short version
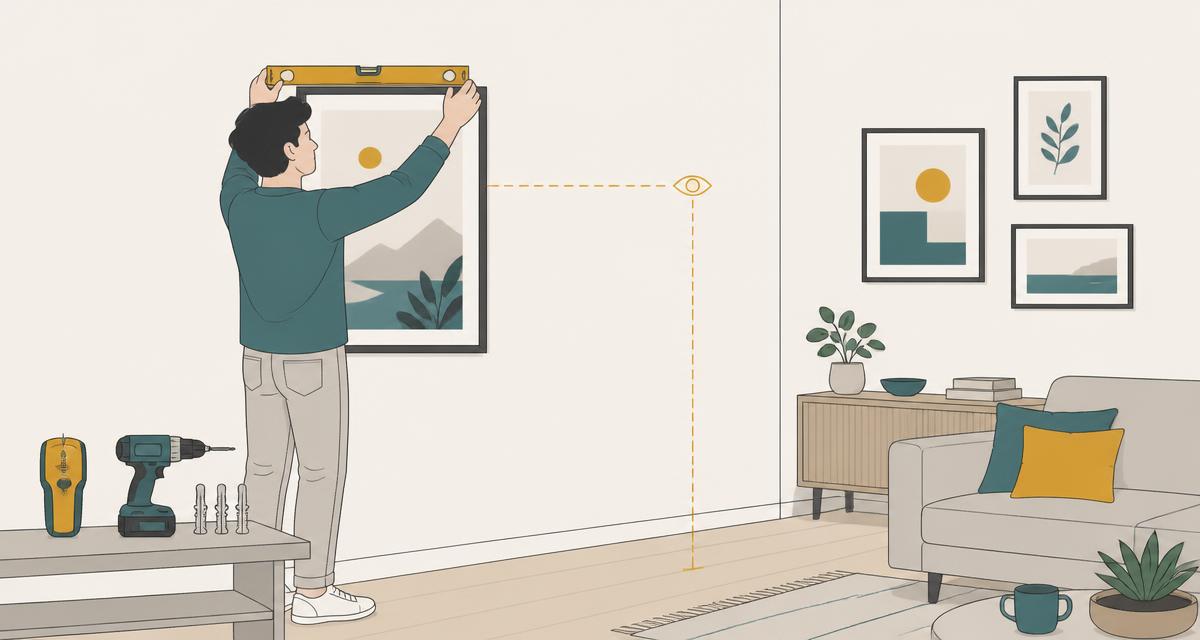
Hanging something on a wall is four decisions, in this order: what the wall is made of, what the piece weighs, which fixing bridges the two, and how high it goes. Get the first three right and nothing falls down. Get the fourth right and the room looks composed rather than accidental.
150 cm
Centre height of the piece, floor to middle
15–25 cm
Gap above a sofa, console or headboard
50%
Maximum share of a fixing's rated load you should use
2
Fixings on anything wider than 50 cm or heavier than 5 kg
The rest of this guide is the detail behind those four numbers: how to tell plasterboard from dot-and-dab in ten seconds, which anchor actually holds a 20 kg mirror, how to lay out a gallery wall on the floor before a single hole is drilled, and where in a wall you must never drill. If you would rather skip the drilling entirely, that is what our mirror and artwork hanging service is for.
Step 1: identify your wall — it decides everything
Almost every hanging failure traces back to a wrong assumption here. British homes contain four common wall builds, and each takes a completely different fixing. Spend ninety seconds identifying yours.
| Wall type | How to spot it | What it means |
|---|---|---|
| Plasterboard on timber studs | Drums when knocked; a drawing pin pushes in by hand; detector finds solid timber every 400 or 600 mm | Best case. Fix into the stud and you can hang almost anything |
| Dot-and-dab plasterboard on masonry | Sounds hollow in places and solid in others; a long drill bit hits brick after 10–40 mm of air | The trap. Hollow-wall anchors pull the board off the wall — use a through-fixing to the brick |
| Solid brick or block | Dull, dead knock; drill dust is red, grey or buff; drilling needs hammer action | Strongest option. Plug and screw, or a masonry frame fixing for heavy pieces |
| Lath and plaster (pre-1930s) | Hollow but softer knock; drilling produces horsehair-flecked dust and hits timber strips | Fragile. Fix into the timber studs behind, never rely on the plaster itself |
Finding the studs
- Studs usually sit at 400 mm or 600 mm centres, so once you find one, measure across to find the rest.
- There is almost always a stud beside every door opening and at every internal corner.
- Sockets and switches are screwed to a stud or a noggin — a useful free clue about spacing.
- Confirm with two detector passes at different heights; a single reading can be a pipe or a cable.
- A 2 mm pilot hole in the pencil mark tells you the truth: gritty resistance is timber, free air is not.
Step 2: weigh the piece and halve every fixing
Do not estimate the weight. Stand on bathroom scales holding the mirror, subtract your own weight, and work from the real figure. Framed glass is far heavier than people expect: a 60 x 90 cm mirror with a timber frame is routinely 12–18 kg, and a full-length leaner is often 25 kg or more.
The 50% rule
Every anchor carries a stated maximum load, measured in laboratory conditions in perfect board. Real walls have old screw holes, damp patches, thin skim and vibration from doors. Plan for each fixing to carry no more than half its rating, and split the weight across two fixings. A 16 kg mirror on two fixings is 8 kg each, so each anchor should be rated at 16 kg or better.
| Weight of piece | Fixings | What it needs |
|---|---|---|
| Under 3 kg | 1 | Picture hook or adhesive strip on sound plaster is fine |
| 3–7 kg | 1–2 | Hardened picture hook, or a plastic plug in masonry |
| 7–15 kg | 2 | Metal self-drilling anchor or spring toggle; stud fixing preferred |
| 15–30 kg | 2 | Timber stud, masonry plug and screw, or heavy-duty toggle rated 40 kg+ |
| 30 kg and over | 2–4 or a cleat | French cleat spanning two studs, or masonry frame fixings |
Step 3: choose the fixing
This is the chart worth screenshotting. Read across from your wall type and weight band, and buy the fixing before you start — the most common cause of a botched job is using the plug that came in the box with the mirror.
| Wall | Load | Fixing | Drill |
|---|---|---|---|
| Timber stud | Up to 30 kg per screw | 5.0 x 60–70 mm woodscrew, no plug | 3 mm pilot, wood bit |
| Hollow plasterboard | Under 5 kg | Plastic plasterboard plug or hardened hook | 5–6 mm, no hammer |
| Hollow plasterboard | 5–15 kg | Self-drilling metal anchor (e.g. Driva-type) or nylon expansion anchor | Self-drilling, or 8 mm |
| Hollow plasterboard | 15–30 kg | Metal spring toggle or heavy-duty hollow-wall anchor | 10–13 mm, no hammer |
| Dot-and-dab | Any real load | Through-fixing to the masonry behind (Corefix-type sleeve) | As supplied, usually 10 mm then 8 mm |
| Brick | Up to 25 kg per screw | Brown 7 mm nylon plug with 5.0 x 60 mm screw | 7 mm masonry, hammer |
| Aerated block (Thermalite) | Up to 20 kg | Purpose-made aircrete anchor — standard plugs spin out | As supplied, no hammer |
| Lath and plaster | Any load | Woodscrew into the stud behind; never into laths alone | 3 mm pilot |
| Tile over masonry | As substrate allows | Plug into substrate, sealed hole, stainless screw | Diamond/spear bit first |
Not sure what is behind your wall? Send a photo of the wall and the piece — we'll tell you the fixing, or fit it for a fixed price.
Step 4: work out the height (the bit most people guess)
Galleries and museums hang to a centre line of roughly 150 cm from the floor, because that is average standing eye level. Domestic rooms follow the same rule with one exception: when a piece sits above furniture, the furniture — not the floor — sets the reference.
The formula
You are not marking where the frame goes; you are marking where the fixing goes. Work it out like this:
- Halve the frame heightA 90 cm tall frame is 45 cm from its centre to its top edge.
- Add it to your centre height150 cm centre + 45 cm = 195 cm, which is where the top of the frame will sit.
- Measure the dropWith the cord or D-ring pulled taut, measure from the top of the frame down to the hook point — say 10 cm.
- Subtract the drop195 cm − 10 cm = 185 cm. That is your pencil mark for the hook, not 150 cm.
Interactive tool
Hanging-height calculator
Enter your piece and the situation. The calculator works the formula for you and gives the one number you actually mark on the wall: the hook height.
Gallery standard: the middle of the piece sits at average standing eye level.
Overall height of the mirror or frame, top to bottom.
With the cord or D-ring pulled taut, the distance from the top of the frame down to the hook point.
Mark your hook at
185 cm
Measured from the finished floor, straight up the wall. Centre line at 150 cm from the floor.
- Top of frame
- 195 cm
- Centre of piece
- 150 cm
- Bottom of frame
- 105 cm
Figures are guidance for typical UK rooms with 2.4 m ceilings. Always confirm the fixing suits your wall type and that the load stays under half the anchor's rated capacity.
| Situation | Target | Why |
|---|---|---|
| Clear wall, standing room | Centre at 145–152 cm | Sits at eye level for most adults |
| Above a sofa | 15–25 cm gap above the back | Any more and the piece floats; any less and it looks jammed |
| Above a console or sideboard | 15–20 cm gap | Ties the piece to the furniture below it |
| Above a bed | 20–25 cm above the headboard | Keep it light — see the safety note |
| Dining room, seated view | Centre at 135–145 cm | Seated eye level is lower |
| Stairwell | Centre 150 cm above the nose of each tread | Follows the rake so the run reads straight |
| Hallway full-length mirror | Top at 175–185 cm | Full head-to-toe reflection for most heights |
| Above a fireplace | 10–15 cm above the mantel | Check heat and soot exposure before hanging art |
The kit you actually need
You can do 90% of hanging jobs with about £60 of tools, most of which you will use again. The detector is the one place not to economise — the cheapest models find studs but miss live cables.
| Tool | Typical cost | Why it matters |
|---|---|---|
| Combined stud, metal and live-cable detector | £25–£60 | The only thing standing between a drill bit and a cable |
| Cordless combi drill with hammer setting | £50–£120 | Hammer for masonry, hammer off for board and tile |
| Masonry bits 5.5/6/7 mm and wood bits 2/3 mm | £10–£20 | Wrong diameter is the second most common failure |
| 600 mm spirit level or a laser level | £12–£45 | A phone app is not accurate over a metre |
| Tape measure and a proper pencil | £5 | Marks that survive being rubbed with a thumb |
| Assorted fixings for your wall type | £8–£15 | Buy for the wall you have, not the one in the instructions |
| Masking tape | £2 | Stops bits skating on tile and catches dust |
| Safety glasses | £4 | Masonry dust in an eye ends the afternoon |
Tool rental vs buying: what makes sense in the UK
Most hanging jobs never justify a hire ticket — the kit is cheap, small and gets reused. Hire only earns its keep for the awkward one-offs: an SDS drill through Victorian engineering brick, a rotary laser for a long gallery run, or a scaffold tower for a stairwell mirror. The simple test is the three-use rule: if you will use it three times in the next two years, buy it; if it is a single afternoon, hire it or borrow it from a tool library.
| Tool | Buy (UK) | Hire (1 day / week) | Verdict |
|---|---|---|---|
| Stud, metal and live-cable detector | £25–£60 | Rarely hired | Buy — you need it before every hole |
| Cordless combi drill | £50–£120 | £12–£18 / £30–£45 | Buy if you own a home; hire for one flat-move |
| SDS+ rotary hammer drill | £70–£160 | £15–£25 / £40–£65 | Hire unless you drill hard masonry often |
| Diamond core drill / tile bit set | £15–£40 | £20–£30 / £55–£80 | Buy the bits; hire only the core rig |
| Cross-line laser level | £35–£110 | £15–£22 / £40–£60 | Buy if you plan gallery walls; otherwise hire |
| Rotary laser level | £250+ | £25–£40 / £70–£110 | Hire — overkill for domestic hanging |
| Dust extractor / drill dust shroud | £20–£90 | £18–£28 / £50–£75 | Buy the £20 shroud, skip the extractor |
| Podium step or 1.5 m platform | £70–£150 | £12–£20 / £30–£50 | Hire for one stairwell job |
| Alloy scaffold tower (stairwell mirror) | £600+ | £45–£75 / £110–£190 | Hire — never buy for a single wall |
| Suction lifting handles (heavy mirror glass) | £20–£45 | £10–£15 / £25–£40 | Buy — cheap, and you will drop less |
When buying wins
- Total spend under about £60 — a detector, bits and a level cost less than two days of hire plus fuel.
- You own the property and will hang shelves, blinds, curtain poles or a TV within the same year.
- The job is spread over several evenings — hire is charged by the day whether you use it or not.
- You need the tool at short notice on a Sunday, when most trade counters are shut or on reduced hours.
When hiring wins
- One-off heavy masonry: an SDS drill hired for £15–£25 beats a £120 purchase you use once.
- Access equipment — towers and podiums cost more to store than to hire, and hire stock is inspection-certified.
- Specialist glass handling for a single oversized mirror, where suction cups and a second pair of hands matter more than ownership.
- You are renting and cannot store tools; many councils and community tool libraries lend for £5–£15 a week with a membership.
The honest maths for a single heavy mirror: buying everything you would need for a solid-brick chimney breast comes to roughly £110–£200, hiring the drill and keeping the cheap consumables comes to about £45–£80, and having it hung professionally is £40–£75 with fixings, levelling and insurance included. If it is one mirror, paying a fitter is usually the cheapest route; if it is a whole house of art, buy the kit.
Not worth buying an SDS drill for one mirror? Get a fixed price to have it hung properly.
Printable hanging checklist (free PDF)
Print this, tape it beside the wall and work down it. Every line is a decision people usually make by eye — wall type, fixing rating, safe zones, hook height — and getting each one right in order is the difference between a mirror that sits level for ten years and a repair job.
Mirror & Artwork Hanging Checklist (Free Printable PDF)
Hello Services · helloservices.co.uk/blog/how-to-hang-mirrors-and-artwork · 6 sections · 40 checks
A4 · 2 pages · 6 sections · 40 checks · free, no email needed. Ticks save on this device, and if you sign in they sync to your account — start the list on your phone, finish it on a laptop, then print or save a clean copy.
Progress: 0 of 40 ticked (0%) · 40 checks left · tick boxes: ☐ = to do, ☑ = done.
1. Before you buy a single fixing
2. Choose the fixing (halve every rating)
3. Work out the height before you mark anything
4. Safety checks — do not skip
5. Drill, fix and hang
6. Final checks before you tidy up
Checklist questions: spacing, drilling and common mistakes
Each answer points to the section of the printable PDF that covers it.
Hanging a single frame, step by step
- Fit the hardware to the frame firstTwo D-rings, one third of the way down each side, beat a single wire every time. Measure the distance between them precisely — that is the distance between your two holes.
- Mark the height lineWork out the hook height with the formula above, then draw a light horizontal pencil line with a spirit level. One line, both marks on it, and the frame cannot hang crooked.
- Scan before you drillDetector in metal and live modes, scanned in a cross pattern 30 cm around each mark. Check the safe zones described below before you accept the reading.
- Drill to depth, not by feelWrap masking tape round the bit at the required depth: fixing length plus 10 mm. Keep the drill level and square to the wall, hammer off in board, on in masonry.
- Insert the fixing properlyPlugs go in flush, not proud, not sunk. Toggles must be fully deployed behind the board — tug the screw gently to confirm before loading it.
- Leave the screw head proudDrive the screw until roughly 4–5 mm of head stands off the wall so the D-ring or hook can sit on the shank rather than being pinched.
- Lift, seat and levelTwo people for anything over 15 kg. Seat both rings, then check the level across the top and adjust one hook rather than tilting the frame in place.
- Load test and finishPress down firmly on the top edge with your palm, listen for creaking, and fit self-adhesive rubber bumpers to the bottom corners to stop marking and drifting.
Heavy mirrors: cleats, safety and the two-person rule
Above roughly 25 kg, ordinary hooks stop being the right answer. A French cleat — a batten cut at 45 degrees, one half screwed to the wall and one half to the mirror — spreads the load across multiple fixings and lets the piece drop into place rather than being held out from the wall on two points.
Fitting a French cleat
- Use a 18–20 mm hardwood ply or timber batten cut lengthways at 45 degrees.
- Screw the wall half with the sloped face pointing up and into the wall, spanning at least two studs.
- Fix at 300 mm intervals — five screws across a 1.2 m batten is not overkill on a 40 kg mirror.
- Screw the mirror half sloped face down and out, set 10 mm below the top edge so the batten stays hidden.
- Add a spacer strip of the same thickness at the bottom of the mirror so it hangs flat rather than tilting.
- Never fix a cleat to plasterboard alone: it must reach timber studs or masonry.
Antique and frameless mirrors add two more problems: the silvering is fragile, and the mounting hardware is often original and fatigued. Replace old cord and hooks as a matter of course, support the mirror from underneath while you seat it, and never lay a large mirror flat on a hard floor while you work — stand it on a folded towel against a wall at a slight angle.
Heavy, antique or oversized? Send the dimensions and a photo of the wall — we'll fit it properly for a fixed price.
Planning a gallery wall without swiss-cheesing the plaster
A gallery wall lives or dies on the layout, and the layout should be finished before any drill comes out of the box. Do it on the floor.
- Measure the wall and mark it out on the floorUse masking tape on the carpet to mark the exact width and height of the usable wall area, including the sofa line if there is one.
- Arrange inside the tapeStart with the largest piece slightly off-centre, then balance around it. Keep 5–8 cm between frames — consistent gaps read as deliberate, varied ones read as accidental.
- Photograph the layoutA phone photo from directly above is your reference for the rest of the job, and it is far easier to critique than the arrangement itself.
- Make paper templatesDraw round each frame on newspaper or lining paper, cut out, and mark the hook position on each template.
- Tape the templates to the wallReposition freely until it looks right, checking the group's overall centre sits near 150 cm. Live with it for a day if you are unsure.
- Drill through the templateDrill straight through the marked hook point, then tear the paper away. Every hole lands exactly where you planned it.
Layout rules that hold up
- Treat the whole group as one rectangle and centre that rectangle, not each individual frame.
- Grids need identical frames and identical gaps; salon-style hangs need varied sizes but one shared alignment line.
- An odd number of pieces almost always looks more natural than an even number.
- Above a sofa, the group should span roughly two thirds to three quarters of the sofa's width.
- Repeat one element — frame colour, mount width or palette — so mixed sizes still read as a set.
- Hang the bottom row first and work upwards; errors compound less that way.
Awkward walls: lath, dot-and-dab, tile and chimney breasts
Lath and plaster
Common in Victorian and Edwardian homes. The plaster is brittle and the thin timber laths behind it split if you force a fixing into them. Find the studs, drill a 3 mm pilot slowly with no hammer, and use a woodscrew straight into the timber. Anything hung on the plaster alone will eventually pull a cone of plaster out of the wall.
Dot-and-dab
Use a through-fixing that sleeves across the cavity and grips the blockwork, so the load never sits on the board. Fitted correctly these carry 50 kg and more, which makes dot-and-dab one of the stronger walls in the house — as long as you respect the cavity.
Tiled walls
- Mark the point with masking tape so the bit cannot skate across the glaze.
- Use a diamond or spear-point tile bit, lowest speed, no hammer, light pressure, and keep the tip cool.
- Drill in the middle of a tile, never within 15 mm of an edge or a grout line.
- Once through the tile, switch to a masonry bit and hammer action for the substrate.
- Seal the hole with a dab of silicone before inserting the plug in bathrooms and kitchens.
Chimney breasts
The masonry is often soft, uneven and warm, and there may be a live or capped flue behind it. Avoid drilling deep, keep to the outer face, and never fix into a flue liner. Heat and soot also rule out hanging valuable art directly over a working fire — the temperature swing and particulates are hard on paper and pigment.
Plaster over insulation
Internally insulated external walls — increasingly common after retrofit grants — have insulation board behind the plasterboard, sometimes 60–100 mm of it. Standard fixings simply compress the foam. These walls need long insulation-specific anchors that reach the masonry, and it is worth checking what was installed before you drill through a vapour barrier.
Hanging things in a rented home
Most UK tenancy agreements restrict drilling, but few ban it outright — the usual wording requires the walls to be returned in their original condition. That is a repair standard, not a prohibition.
- Ask the landlord or agent in writing and keep the reply; verbal permission is worth nothing at check-out.
- Photograph each wall before you start, so pre-existing marks are not attributed to you.
- Prefer a small number of fixings over many; two clean holes are easier to make good than ten pin marks.
- Keep the fixings, the paint code and any spare filler in one bag for the end of the tenancy.
- Fill, sand and touch up before the inventory check, not after — the clerk photographs what they see.
- Adhesive strips can lift paint on their way off; test one in a wardrobe first, and warm it before peeling.
If you are near the end of a tenancy, sequence the make-good work before the clean, not after — the same order we set out in the end of tenancy cleaning guide. Filler dust settles on everything, so cleaning first is wasted money.
Cables, pipes and safe zones
UK wiring practice runs cables in predictable places, and knowing them is what turns a detector reading into a decision. Treat these bands as live until proven otherwise:
- A 150 mm band below the ceiling line and along every internal corner.
- A vertical band running straight up and straight down from every socket, switch and fused spur.
- A horizontal band running left and right at the exact height of every socket and switch.
- The wall directly above and below a boiler, kitchen units, a bathroom or a shower — pipework as well as cable.
- Party walls and the wall behind a consumer unit, where cable density is highest.
Two more practical points: isolate the circuit at the consumer unit if you must drill anywhere near a safe zone, and be aware that homes built between roughly 1950 and 1999 may contain asbestos in wall boards, textured coatings and around old fireplaces. Never sand or drill an artex-style textured coating without checking — that job needs testing, not a dust mask.
Nine mistakes that crack walls and drop mirrors
| Mistake | What happens | Do this instead |
|---|---|---|
| Using the fixings supplied in the box | Generic plugs sized for a wall you do not have | Buy fixings for your wall and load |
| Hammer-drilling plasterboard | A ragged hole no anchor can grip | Hammer off until you reach masonry |
| One central hook on a wide frame | The frame drifts out of level constantly | Two D-rings at one third from each side |
| Hanging at 170 cm to 'fill the wall' | Piece floats above eye line, room feels cold | Centre at 145–152 cm |
| Ignoring the dot-and-dab cavity | The board tears away from the blockwork | Through-fix to the masonry behind |
| Trusting adhesive strips with glass | Failure is sudden and cuts | Drill anything that can break |
| Drilling above a socket | Cable strike in the vertical safe zone | Move 100 mm sideways and rescan |
| Skipping the load test | The failure happens later, unattended | Palm-press the top edge before you walk away |
| Hanging a heavy mirror above a bed | Serious injury risk if anything gives | Use light framed prints or canvas |
When to stop and call someone
Most hanging jobs are genuinely DIY. A handful are not, and they share one feature: the cost of getting it wrong is much higher than the cost of getting it done.
- The piece is over 30 kg, antique, or irreplaceable.
- The wall is lath and plaster, internally insulated, or you cannot identify it with confidence.
- The location is above a bed, a cot, a stairwell drop or anywhere a fall would hurt someone.
- Cables or pipes are known to run through the area and cannot be avoided.
- It is a gallery wall of eight or more frames — the layout time, not the drilling, is what costs you.
- You are in a rented home and a wrong hole comes out of your deposit.
| Job | Typical price | Time on site |
|---|---|---|
| Single mirror or heavy framed piece | £40–£75 | 30–45 mins |
| Oversized or antique mirror, two fitters | £85–£150 | 1–1.5 hrs |
| Gallery wall, 6–9 frames | £90–£180 | 2–3 hrs |
| French cleat installation | £70–£130 | 1–1.5 hrs |
| Fill and make good old picture holes, per room | £40–£80 | 1 hr plus drying |
Those figures sit inside the wider rate structure explained in the handyman hourly rate guide — and if you have several jobs waiting, a half day almost always beats booking them one at a time.
Send a photo of the piece and the wall — you'll get a fixed price, fixings included, before anyone arrives.
Ask a question and we will point you to the answer
Ask a question about your wall
Describe what you are hanging and what the wall is made of. We will point you at the part of this guide that answers it — or pass it to the handyman desk for a human reply.
Hanging mirrors and artwork in Greater Manchester
Wall construction in Greater Manchester is unusually mixed, and it is the single biggest reason a fixing that worked in one flat fails two miles away. Three broad building eras cover most of the county, and each behaves differently under a drill.
Mill and warehouse conversions — Ancoats, Northern Quarter, Castlefield, Salford Quays
Converted cotton mills off Great Ancoats Street and around Cutting Room Square are largely solid load-bearing brick, often a full brick-and-a-half thick, with hard lime or cement render over it. That is the best wall you can be given: a 7 mm or 8 mm masonry plug takes a heavy mirror comfortably. The catch is that these buildings frequently have exposed brick as a design feature, so holes are permanent and obvious — plan the layout on the floor first, and set out from the mortar joints where you can, because a plug in mortar is easier to make good than one through a Victorian facing brick. Newer towers around Deansgate and the Quays are the opposite: metal-stud partitions with a single 12.5 mm plasterboard skin, where anything over about 5 kg needs a metal toggle or a screw straight into the stud.
Victorian and Edwardian terraces — Chorlton, Levenshulme, Didsbury, Whalley Range, Prestwich
The byelaw terraces across south Manchester and Bury typically have solid brick external walls with no cavity, plus lath-and-plaster or later plasterboard-over-batten internal partitions. Chimney breasts are everywhere, and they are where people most want a mirror. Drill into the brick pier either side of the opening rather than into the breast face directly above a working fire, keep clear of the flue liner, and expect the first 15 mm of a lath wall to crumble — drill it on rotary only, never hammer. If the plaster comes away in a dinner-plate patch, that is a repair job before it is a hanging job.
Post-war and new-build estates — Wythenshawe, Salford, Middleton, Hulme
Estates from the 1960s onwards, and almost every new-build since 2000, use dot-and-dab: plasterboard stuck to blockwork with adhesive dabs, leaving a 20–30 mm void behind the board. A standard plasterboard plug in a dot-and-dab wall is the most common failure we are called out to fix in Greater Manchester, because the plug only ever grips the board. Use a through-fixing such as a Corefix or a long frame fixing that reaches the block behind, or find a dab and land the screw on it.
Practical local details worth knowing
- Leasehold apartments across the city centre, Salford Quays and MediaCity commonly restrict drilling into party and structural walls — check your lease before a heavy mirror goes up, not after.
- Student and short-let stock in Fallowfield, Withington and Hulme turns over hard every August; if you are hanging in a let, use over-door hooks or a French cleat you can lift off and make good in ten minutes.
- Loading bays around the Northern Quarter and Ancoats are tight and largely permit-controlled — book a slot or the ten-minute job becomes an hour.
- Older terraces in Levenshulme, Gorton and Openshaw often have surface-run or rerouted cabling from past rewires, so a detector reading matters more here than in a new-build.
- Damp on canal-side and basin properties in Castlefield and along the Rochdale Canal means stainless or plated fixings on any external-facing wall.
If you would rather not test which of the three you have, our mirror and artwork hanging service in Greater Manchester covers all 115 areas from Manchester city centre to Wigan, Stockport, Bolton and Oldham — you can find your own neighbourhood on the area directory.
Frequently asked questions
Related services
- Mirror & artwork hangingHeavy mirrors, gallery walls and awkward walls — levelled, load-rated and insured.
- TV mountingThe same fixing logic, with cable tidy and viewing-height setup included.
- Shelf installationFloating shelves and alcove runs, rated for what you'll actually put on them.
- Handyman servicesFixed prices from £59, DBS-checked fitters, £1m public liability cover.
You might also find useful
Rather not drill it yourself?
Send a photo of the piece and the wall and you'll get one fixed price — fixings, levelling and tidy-up included, with no callout surprises.